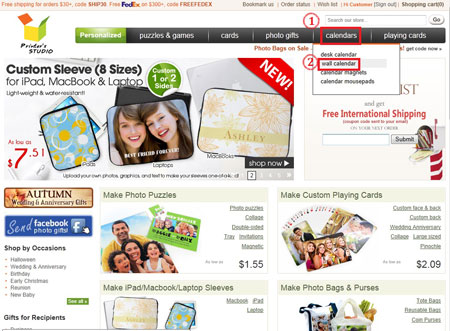
Make your own Wall Calendar
STEP 1:
Hover the mouse-cursor over the calendars tab and click wall calendar
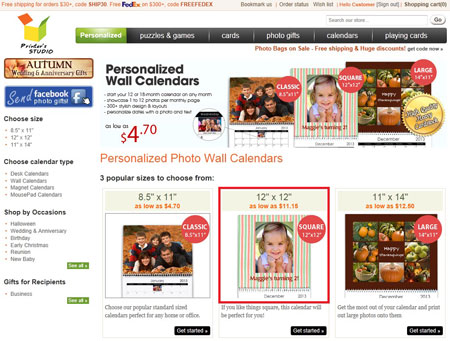
STEP 2:
Choose the size of the calendar.
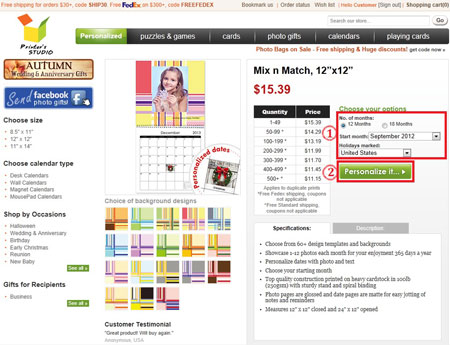
STEP 3:
Select a theme and click on it

STEP 4:
1a. Click the icon to select No. of months to include in the calendar, either 12 or 18 months.
1b. Select the start month from the drop-down list that you want the calendar to start with.
1c. Click the drop-down menu to select Holiday marked in calendar
2. Click the green Personalized it...icon
STEP 5:
Customize Month Pages
To change the photo layout
A. Click the Layouts tab
B. Select a layout depends on the number of images to use on each calendar month pages.
C. Click on the thumbnail matching your desired layout to apply
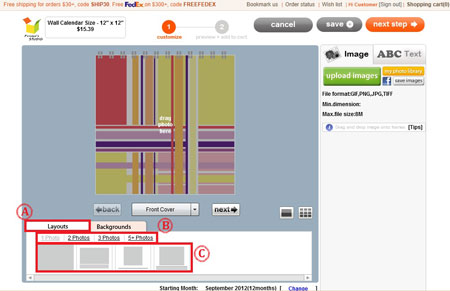
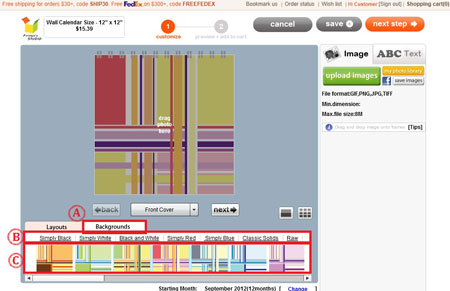
To change the background on your calendar
A. Click the Backgrounds tab
B. Click on the underlined links to select or change a theme
C. To apply a background from your chosen theme, click on the thumbnail image.
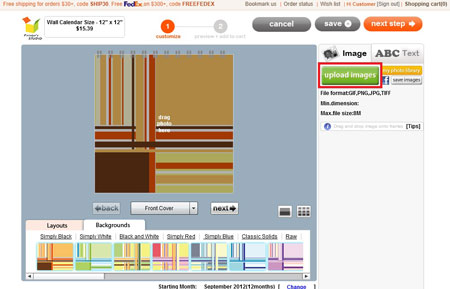
To upload & add photo(s)
- Click on upload images to view the files on your computer's hard drive, floppy drive or digital camera.
Image Requirements NOTE: If the image size, resolution or format is below our minimum requirements, you will receive an error message. Please rescan your image at a higher resolution or select another image. Please refer to our Image Requirements for more information.
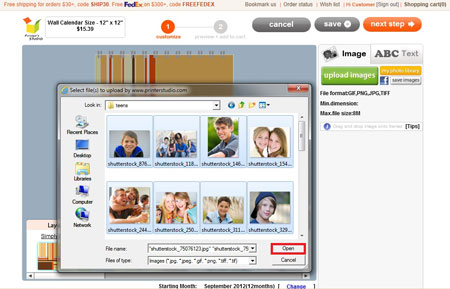
- Select the image file you wish to upload and click Open. Uploaded images are located on the right side of the screen
*To upload multiple images, hold the CTRL key on the keyboard and click on files
- Drag and drop the image onto the drag photo here area
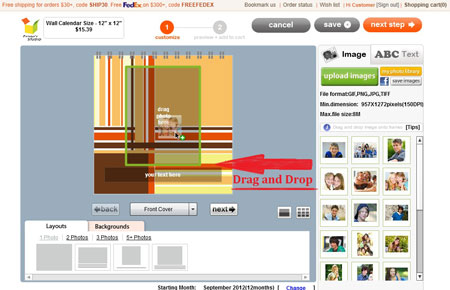
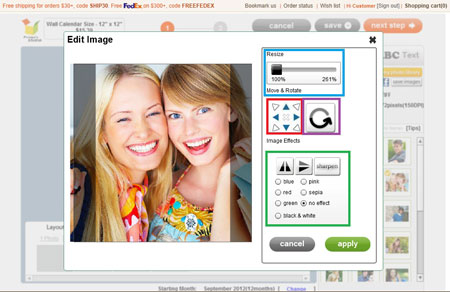
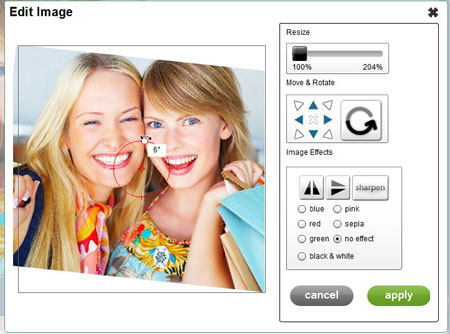
- Click the edit icon under the image to edit the image and click apply when completed.
To resize an image (Blue):
Click and drag the scale bar to resize image
To reposition an image (Red)
Click on the arrow pointer tools and reposition your image
To rotate an image (Purple)
Click on the icon. A thin red line with a white circle handle at top will be displayed on the preview image. Drag the white circle handle at top to rotate an image
To apply color effect to an image (Green)
Click the button next to each effect option
To add text
- Click on the ABC Text tab
- Move the text label Your Text Here to anywhere within the template
- Type your message in the text box under ABC Text tab
- Change font style, color, size and text alignment
- Click on next step button at top-right when you are ready. You can always go back to previous page to make changes by clicking on the previous icon

STEP 6:
Customize your dates
- Click the day you would like to customize and a pop-up will open
- Drag and drop your photo onto drag photo here area
- Add text in the message next to Event text
- When you're finished, click done
To remove a photo or caption from a date, click the date you want to edit. Then, delete the text in the message box and/or click the "x" on the photo.

STEP 7:
Customize all month pages & dates
*Repeat STEP 6 & STEP 7 above to customize each individual month pages & dates
STEP 8:
Click next step after you have finished editing all the pages. You can always go back to previous month to make changes by clicking on the "back" icon.

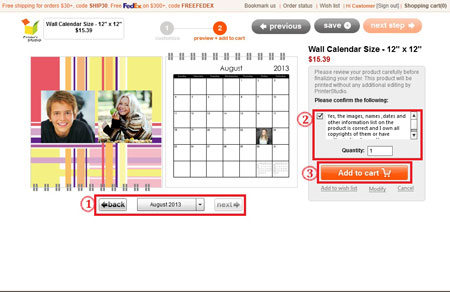
STEP 9:
Preview your design and add to cart
Review your calendar to make sure photos and texts are correct and make any changes by clicking on previous icon at the top of the page.
- Use the drop-down menu or back & next icons to view each month.
- Tick the checkbox to approve your design and to confirm you own the copyrights of them or have authorization to use them.
- Click on Add to cart button